Administration (Admin User)
User Manager
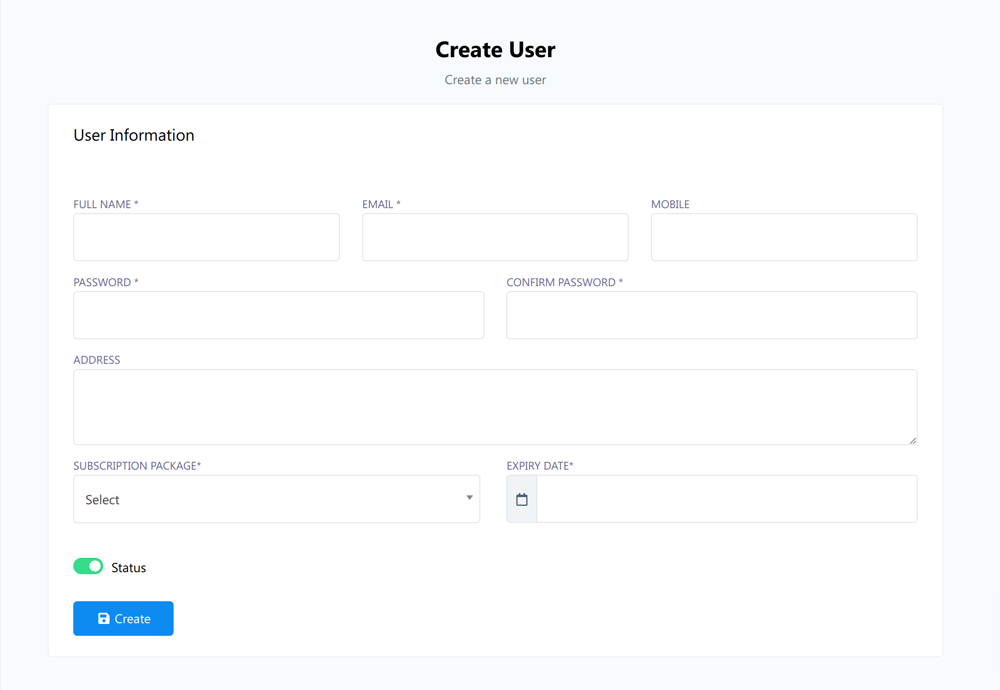
As previously mentioned, the extended license of this app includes a multi-user platform, unlocking a range of features relevant to SaaS businesses. One of these features is the User Manager, which allows users to sign up directly or for the admin to manage users from the panel.
Managing users involves enabling or disabling logins, as well as editing and deleting users. The process for adding users requires a name, email, and package. An important field called `expiry date` specifies the date after which they can no longer use the feature.
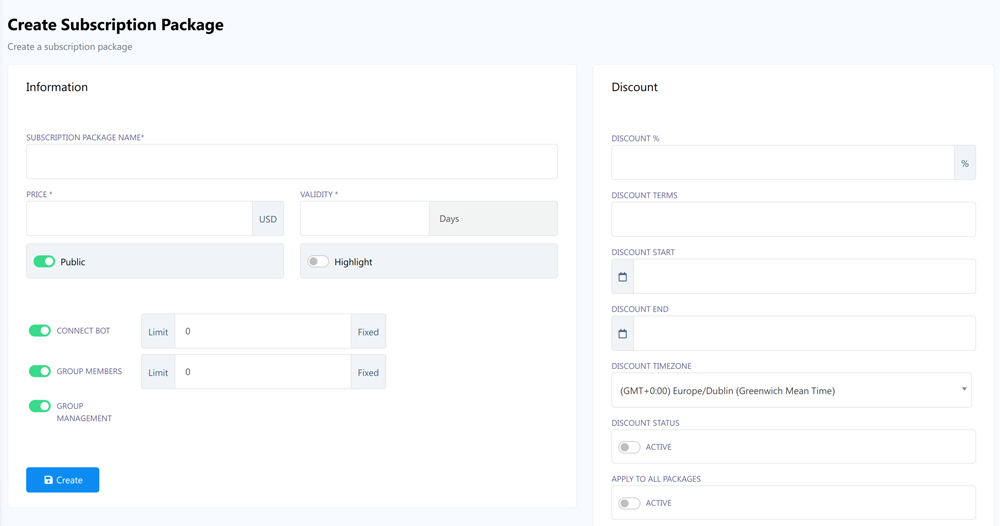
Package Manager
The pricing table displays the package or subscription plan which users can purchase and use the app for a specified duration.
Managing packages involves editing and deleting tasks. While adding packages, information such as package price and validity period is required. You can also specify discount for a subscription package.
Settings
On this page, you have the option to configure all the settings required for the application to function properly.
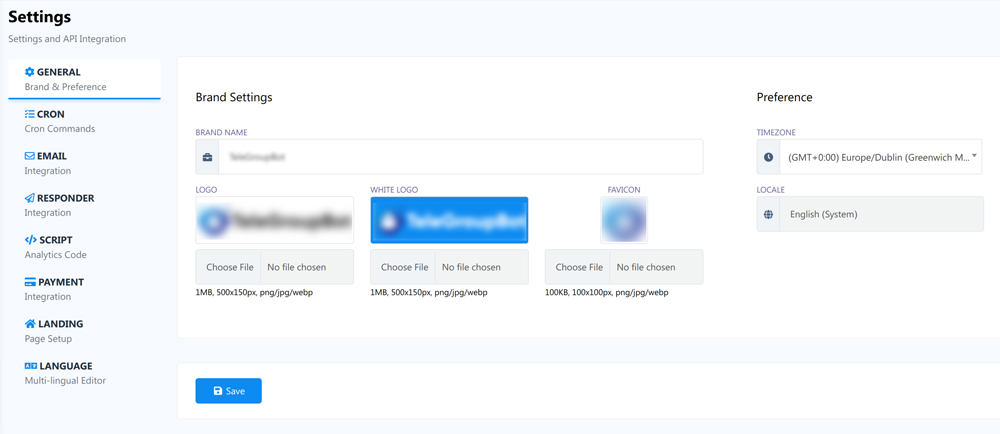
General Settings
Set your brand name,logo, favicon and preference (locale,timezone)
The application will display your brand and operate according to the locale and timezone that you specify.
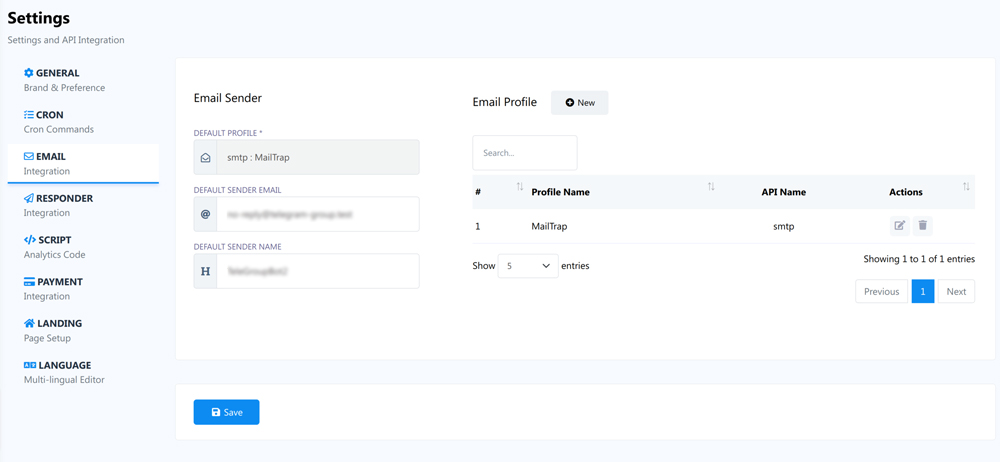
Email Integration
Email settings will be used for several system emails like sign up, email verification, password reset etc.
By default, the application will utilize the PHP mail function for sending emails until you provide your own email profile. If you do not intend to add a custom profile, please ensure that your PHP mail is functioning correctly. You have the option to include multiple email profiles and designate a default profile, informing the app which profile you prefer to use.
We support various email providers including SMTP, Mailgun, Postmark, SES and Mandril. To add a email profile to the application, click on the New button. Do not forget to `Save Changes`.
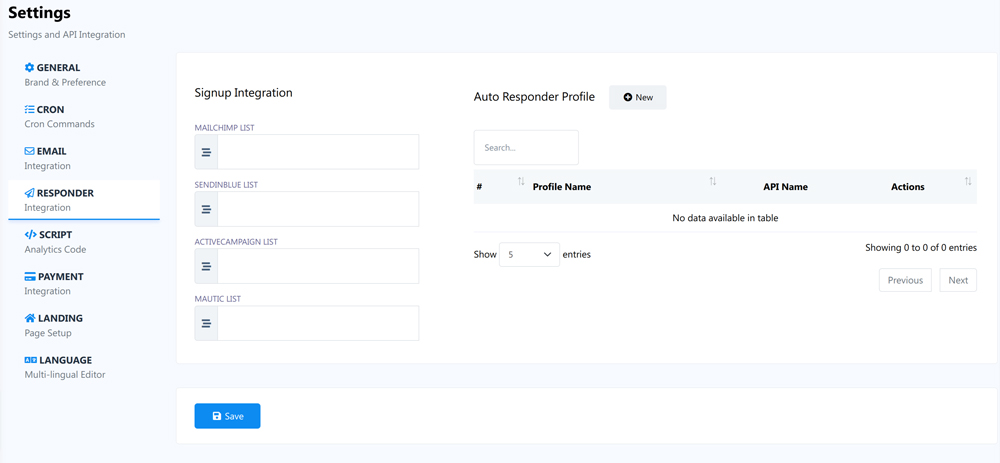
Auto-responder Integration
An autoresponder API, such as Mailchimp,Sendinblue, ActiveCampaign, Mautic are powerful tool for businesses to automate their email marketing campaigns. With this technology, you can set up targeted email sequences, create personalized content, and deliver messages to your audience based on their behavior and interests. The API also provides analytics and reporting features, allowing you to measure the success of your campaigns and make data-driven decisions for future marketing efforts. Overall, an autoresponder API can save time, increase engagement, and ultimately drive revenue for your business.
On this page, you have the ability to configure your autoresponder profile to automatically add any new user who signs up and verifies their email address to your email list. This enables you to seamlessly integrate your email marketing efforts with your user acquisition process, ensuring that your subscribers receive timely and relevant content from your brand.
To add your autoresponder profile, simply click on the New button, and your autoresponder list will be automatically synced. From there, you can specify which list you wish to use and then save your changes.
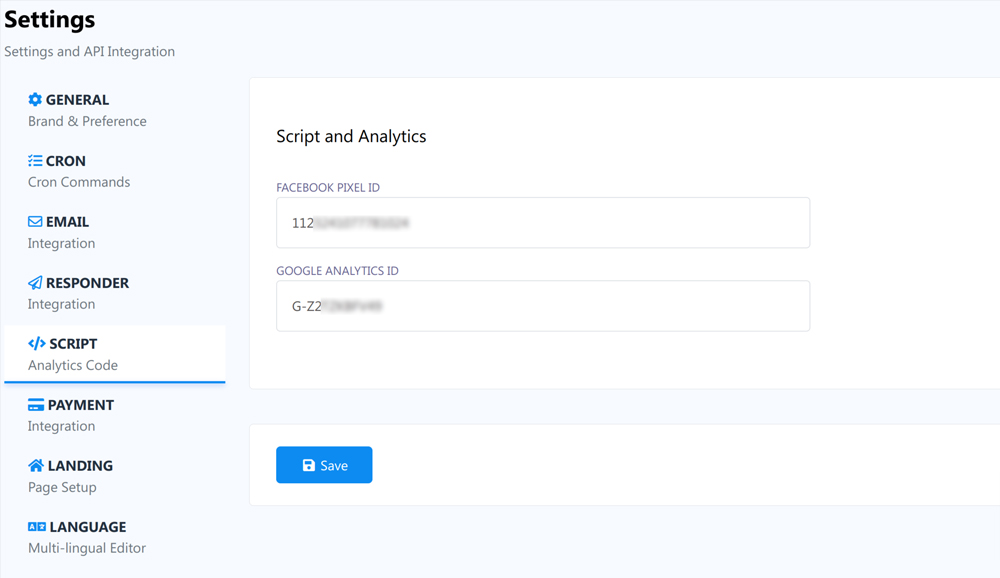
Analytics Scripts Integration
The Facebook Pixel is a code snippet that is added to your website, which enables you to track conversions, optimize ads, and build targeted audiences for your Facebook advertising campaigns. The Pixel collects data on user behavior, such as page views, purchases, and sign-ups, and then uses this information to improve the performance of your Facebook ads.
Similarly, Google Analytics code is a tracking code that is added to your website to provide insights into user behavior and website performance. This code allows you to monitor website traffic, measure user engagement, and identify areas for improvement in your website design and content. With Google Analytics, you can gain valuable insights into your audience and optimize your website for maximum engagement and conversion.
Overall, both Facebook Pixel and Google Analytics code are powerful tools that can help businesses make data-driven decisions to improve their online presence and drive revenue.
To begin tracking your website visitors with Facebook Pixel or Google Analytics, simply add the code (not the full JS scipt only ID) provided by the respective platform. Once the code is added, the analytics script will be automatically loaded on your app landing page, allowing you to start gathering valuable data on your website traffic and user behavior. With this information, you can make informed decisions about your marketing strategy and optimize your website to improve engagement and drive conversions.
Cron Job Commands
A cron job, also known as a cron schedule or cron task, is a command or script that is scheduled to run automatically at specified intervals on a Unix-based operating system. Cron jobs are commonly used for automating repetitive tasks such as data backups, database maintenance, and file system cleanup. The intervals for running these tasks can be set in minutes, hours, days, weeks, or months, allowing for precise control over when they occur. Cron jobs are executed by the Cron daemon, a background service that constantly monitors the system clock and checks for scheduled tasks to run. When a scheduled task is detected, the Cron daemon executes the associated command or script.
This system needs cron job to manage PayPal subscription api calls (extended license only) and to free-up storaged junk data on server periodically.
This is how you can setup cron job in cpanel
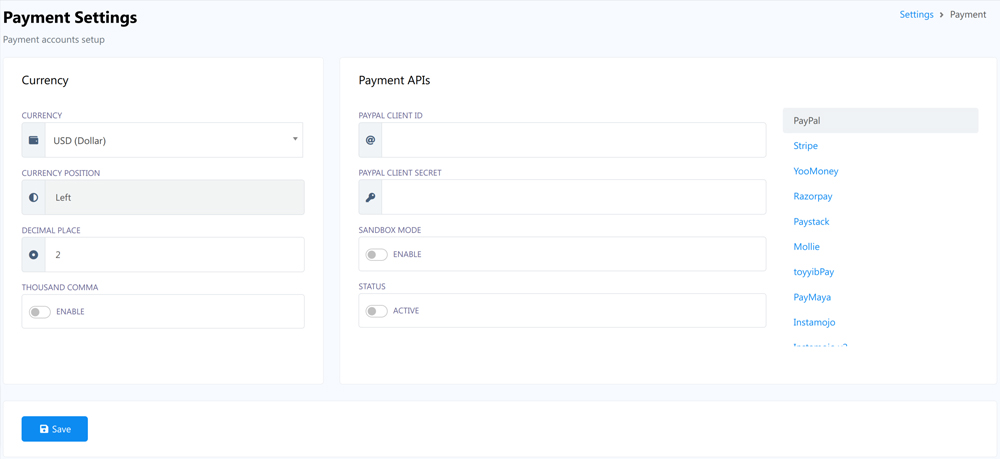
Payment Settings (Limited access for Regular License)
You can leverage the power of a multi-user SaaS platform to sell this app as a service to end-users. SaaS allows you the ability to offer the app as a subscription-based service, enabling you to generate revenue from multiple users.
To facilitate this process, we have integrated several world-leading payment methods that can be used to receive subscriptions from end-users. This ensures that you have access to a wide range of payment options that are trusted and secure, providing a seamless experience for your customers. Overall, the extended license provides a comprehensive solution for businesses looking to monetize their app and leverage the benefits of a multi-user SaaS platform
We curretly support different payment methods including PayPal, Stripe, YooMoney, RazorPay, PayStack, Mollie, ToyyibPay, PayMaya, InstaMojo, Xendit, MyFatoorah etc. Add the payment method you want to use and setup the currency and save.
The regular license does not grant access to the payment APIs, limiting it to only manual payment options.
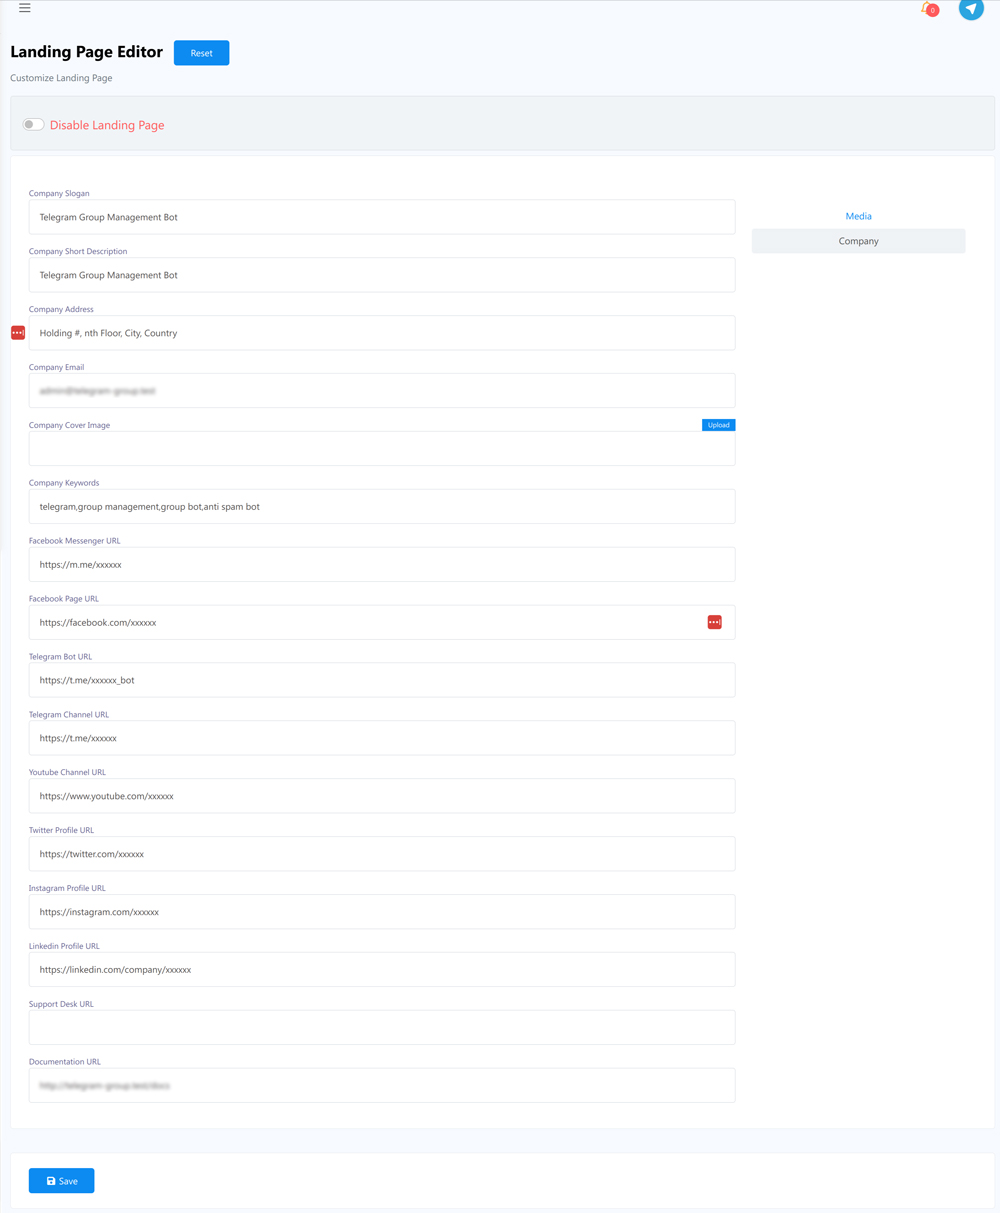
Landing Page Settings
As a SaaS system, it is essential to have a professional and engaging landing page to showcase your app to the world. But do not worry, we have got you covered! Our team has designed a beautiful, responsive, SEO friendly , and resourceful landing page that is fully customizable to fit your unique branding and messaging needs.In addition, our landing page is also supported by a dark mode feature, which provides a sleek and modern look that will appeal to users who prefer a darker color scheme. Overall, our landing page is the perfect tool to help you promote your SaaS system and drive user engagement and adoption.
This page allows you to customize your company information and optimize your SEO meta data. You can also replace existing media on your landing page and display customer reviews to increase engagement. Use can use `Language Editor` to change landing page content which will be discussed later in this article.
You have the option to turn off the review section and enable dark mode on your landing page. Disabling the landing page can be beneficial if you want to use a custom-built landing page. If you prefer to use a custom-built landing page, you can install this app on a sub-domain and install the custom landing page on the main domain. Then, in the settings, you can disable the loading of the landing page on this app.
Language Editor
By default, the app runs in English, but you can change the language from the general settings. If you need to add a language or edit existing content, you can use these tools to manage the language and content. These tools are very user-friendly and do not require detailed instructions to use.
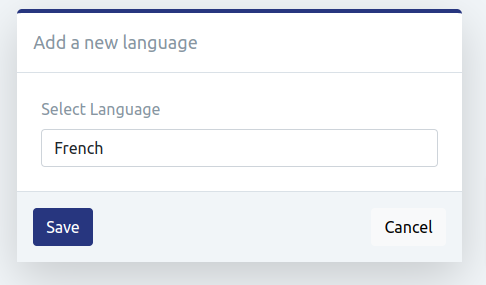
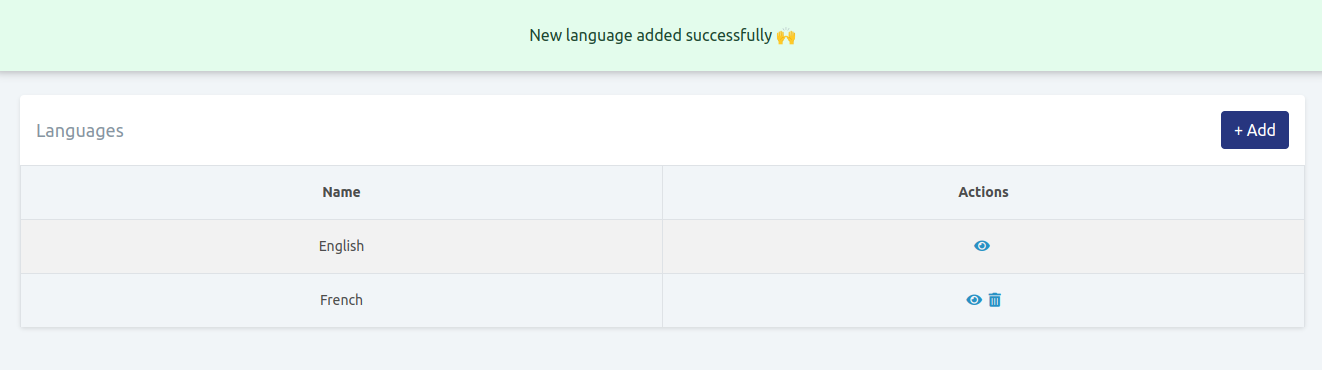
- Click on the Add button to add language. Select a language you want to add and click on the Save button.
- You can delete a language by clicking on the Trash icon.
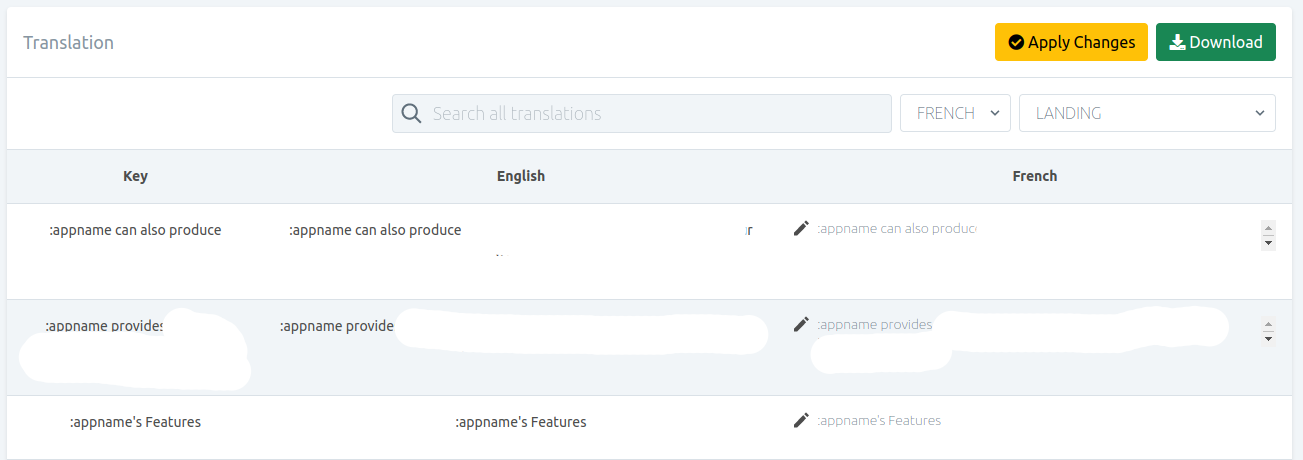
- Click on the eye icon to provide/edit translation.
- After providing translated text you must click on the `Apply Changes` button.
- To download the translated text as json format, click on the Download button.